This is part 2 on the topic of a short series about setting up DNS hosting with Cloudflare and using DNS-01 challenges to get TLS certificates from Let’s Encrypt
See part 1: Moving DNS hosting from Namecheap to Cloudflare
In this post I am sharing my experience setting up a reverse proxy that acts as a frontend for my internal self-hosted web services.
What and why?
A reverse proxy is a service that acts as an entry point to one or more kinds of services, often web services, but it can vary. The reverse proxy is a layer in-between the user and service.
This is what it could look like without a reverse proxy…


…and below, with a reverse proxy. Make note of the protocols used (http vs https), domain names and addresses.


A reverse proxy can serve multiple purposes, but the main two purposes are
- to have a single entry point to one or more services (serving the same, or different content)
- to provide TLS termination for services that might not support it natively
but other reasons could be to load balance traffic, protect against DDOS attacks or cache data for increased performance.
Cloudflare, which I migrated to for their DNS is just actually mostly famous for their great reverse proxy and caching technologies that help websites to stay available1, efficient and secure.
In my case I wanted to have all my self-hosted web services secured by TLS using a root certificate that any device would trust. This would encrypt the traffic flowing between the client and the server making it more secure.
Previously I used my pfSense’s built-in certificate authority manager to set up my own certificate authority (CA). That meant that I created certificates, configured each service to use the certificate (which wasn’t always the easiest or even possible) and renewed them each manually when needed. On top of that, for a device to trust any self-hosted service using my home brewed certificate, the root certificate of the certificate chain would have had to be manually installed on the device. The device’s web browser would otherwise complain and not load the site.
You get the point…
All of the above is both annoying and not really feasible when sharing services with friends and family.
Setting up a reverse proxy, such as Nginx Proxy Manager (NPM), solved these issues.
- Each service gets its own fully qualified domain name (FQDN)
- Each service is secured with TLS using publicly trusted CA making any browser happy
Prerequisites
For this guide we need some prerequisites…
- A Linux host for hosting Nginx Proxy Manager with the following requirements
- Docker and Docker compose installed
- Static IP, in this example
10.0.0.24 - Free ports:
80,81,443
- A publicly registered domain name, in this example
davidisaksson.dev - A DNS provider with support for DNS-01 challenges, for example Cloudflare
Setting up Nginx Proxy Manager
On the Linux host, create a docker-compose.yaml file:
services:
  app:
    # https://github.com/NginxProxyManager/nginx-proxy-manager/releases
    image: 'jc21/nginx-proxy-manager:2.12.6'
    ports:
      - '80:80'    # Public HTTP port
      - '443:443'  # Public HTTPS port
      - '81:81'    # Admin web interface
    volumes:
      - ./data:/data
      - ./letsencrypt:/etc/letsencrypt
    restart: unless-stopped
I like to pin my versions so that I know what the current version is when I do my upgrades. That makes it easier to know what patch notes to read for a safe upgrade procedure.
Also, another pro-tip is to link the releases page by the image for quick and easy reference.
See NPM’s official documentation for a more in depth setup guide.
You should now be able to start the Docker container:
$ docker compose up -d
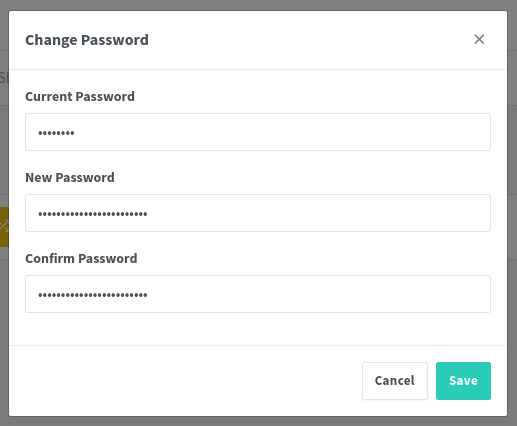
In a web browser, navigate to the host’s IP at port 81; http://10.0.0.24:81, and log in with:
- Email: [email protected]
- Password: changeme

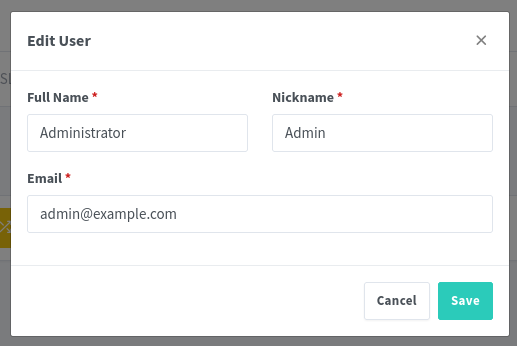
Make sure to change the password during the first login.
You can also take the opportunity to change other user details such as name, nickname and email.
Creating a DNS wildcard record
The goal is to have one single entry point for multiple other services, but how do we access the services if we only have one front door? The solution is to use a special subdomain for all hosts to proxy. We do that by creating a wildcard DNS record pointing to our proxy host. NPM can then look at the FQDN in the client request and determine to what service it should redirect the request.
A bonus with using a wildcard record is that we only need to specify a single record in our DNS provider instead of one for each and every service we want to proxy.
In this case my domain name (davidisaksson.dev) is serving this blog, and I have other internal services using a subdomains of
davidisaksson.dev. NPM, the reverse proxy is hosted in my homelab and needs to have full control of its own subdomain, so I chose to usehl.davidisaksson.devfor this purpose, wherehlstands for homelab.
Depending on if the reverse proxy host is publicly accessible or only locally accessible, there are two ways of setting up the wildcard DNS record.
We can either define the wildcard record in our upstream resolver at Cloudflare, or let a local DNS resolver take control of the subdomain and resolve all DNS queries locally.
I will show both methods, but since my reverse proxy is only accessible on my local network, I ultimately chose to resolve it on my pfSense firewall locally.
Let’s start with the Cloudflare setup.
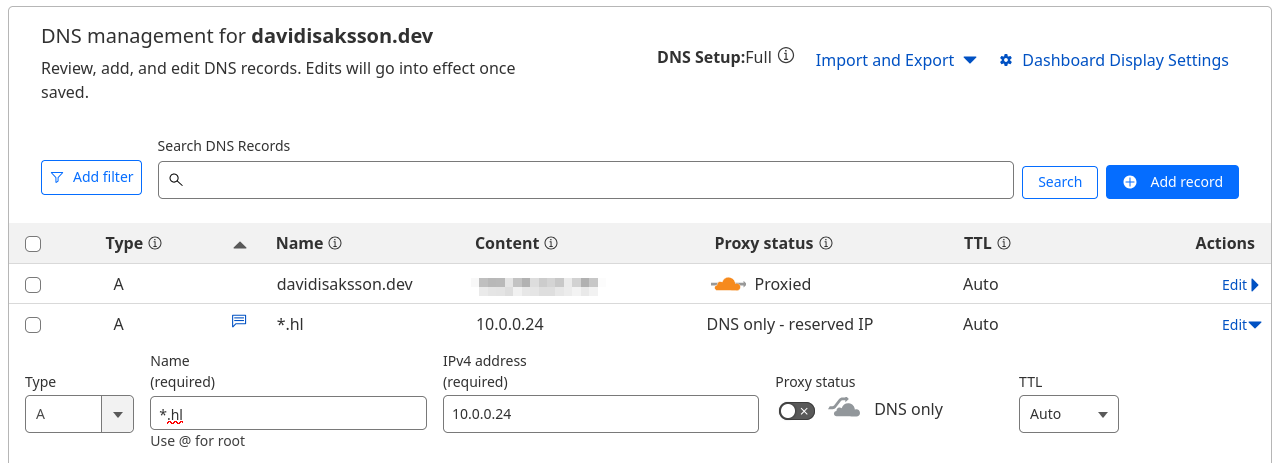
The wildcard DNS record below is set up in Cloudflare’s DNS management interface.
A *.hl 10.0.0.24
This would resolve any subdomain matching *.hl.davidisaksson.dev to the IP 10.0.0.24 where NPM is hosted.
I mentioned above that I use pfSense. It’s my firewall which serves many purposes in my local network. One of which is of course local DNS.
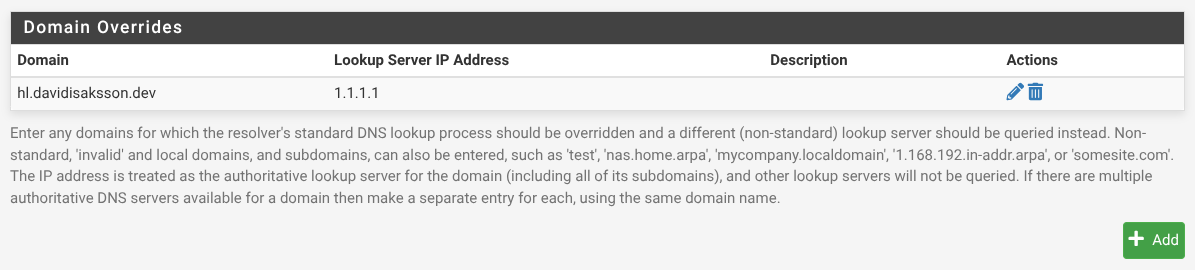
For some reason pfSense’s DNS resolver cannot resolve *.hl.davidisaksson.dev,
so we need to override who should resolve this specific subdomain. To do that,
navigate to Services -> DNS Resolver and scroll down to -> Domain
Overrides.
Add the hl.davidisaksson.dev domain to be resolved by Cloudflare’s DNS
1.1.1.1.
The other option is to set up the wildcard record in pfSense’s DNS resolver.
To do that, navigate to Services -> DNS Resolver and scroll down and expand custom options, and add the following extra configs:
server:
    local-zone: "hl.davidisaksson.dev." redirect
    local-data: "hl.davidisaksson.dev. IN A 10.0.0.24"
Here we tell Unbound (the DNS resolver in pfSense) to redirect any queries for
*.hl.davidisaksson.dev to the IP 10.0.0.24, similar to the configuration
made in Cloudflare above.

When making changes in pfSense, don’t forget to click Save and then Apply Changes at the top of the page.
Regardless of what method used above, if we now from a machine on the network
try to resolve a random hostname in that subdomain with dig we should get the
correct IP address:
$ dig foo.hl.davidisaksson.dev @10.0.0.1
...
foo.hl.davidisaksson.dev. 266  IN      A       10.0.0.24
...
Setting up certificate with Let’s Encrypt
To get TLS termination, that is to add a layer of encryption between the client and server, we need a certificate. Let’s Encrypt is an organization that for verified domains hands out globally trusted certificates. Before we had Let’s Encrypt as a service, you would have to pay a relatively large amount of money to get a valid certificate to use for a website. Today, anyone with a domain name and an email address is eligible for a certificate for free. Huge!
When applying for a certificate from Let’s Encrypt to be used by a service, you need to prove that you are in control of both the service and the domain the certificate should be valid for. You do this through a challenge. Let’s Encrypt provides a few different types of challenges for us to validate our domain ownership. Here we will use the DNS-01 challenge, which under the challenge, requires us to be able to modify DNS records for our domain. (DNS-01 is also the only challenge type that supports wildcard certificates.)
In short, when adding a new host to proxy through NPM, it will ask Let’s Encrypt to issue a certificate for the domain name specified. Let’s Encrypt will then ask NPM to create a DNS TXT record with a special token using an API token. Once the new record is created, Let’s Encrypt will query the public DNS server to check if the new record is created. If it can see the same token, they can be sure that we control both the service and the domain, and will be happy to hand out a signed certificate.
But, for NPM to be able to modify the DNS records in Cloudflare, we need to create an API token.
Creating a Cloudflare API token
Navigate to Cloudflare’s profile settings -> API Tokens and click on Create Token.
At the bottom, select Create Custom Token and fill in the following fields:
- Token Name: Something descriptive, e.g. “Nginx Proxy Manager DNS-01”
- Permissions: Zone, DNS, Edit
- Zone Resources: Include, Specific zone, davidisaksson.dev
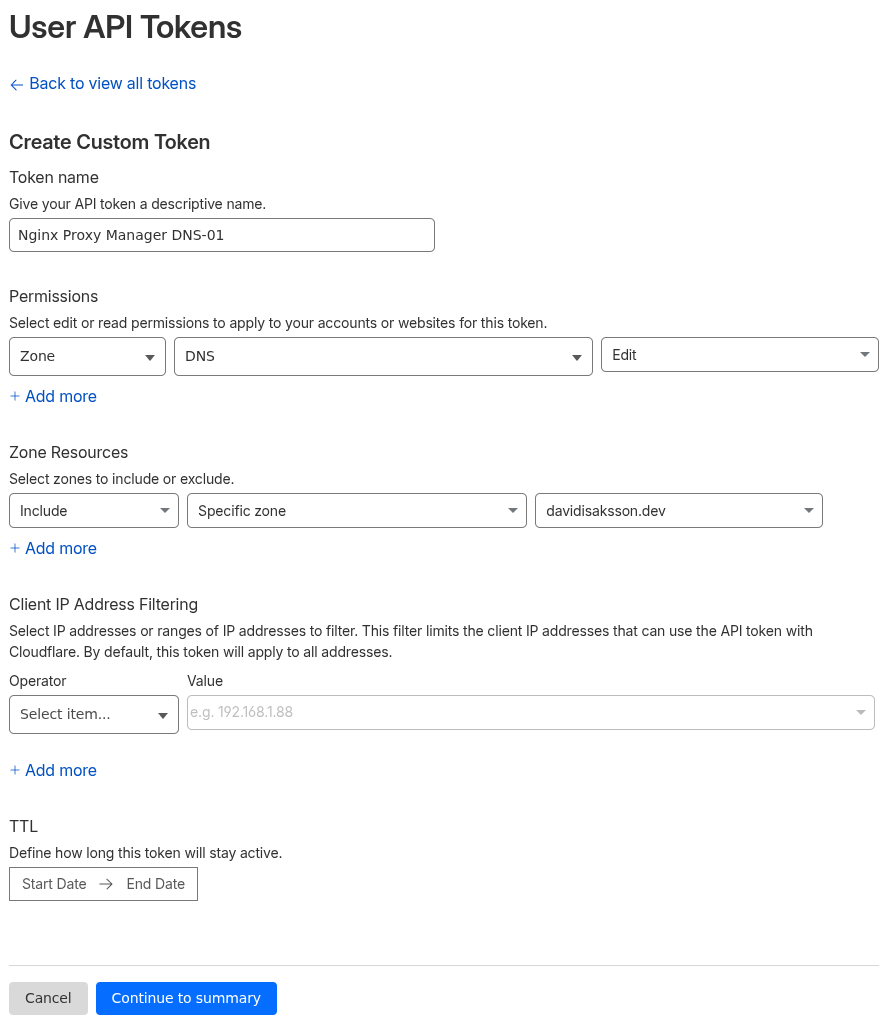
Finally, click Continue to summary and then Create Token.
Make sure to take a copy of the generated token. You will not be able to get another chance later.
Configuring Let’s Encrypt in NPM
Now we will integrate Let’s Encrypt’s services with NPM.
In NPM, navigate to SSL Certificates -> Add SSL Certificate, and choose Let’s Encrypt.
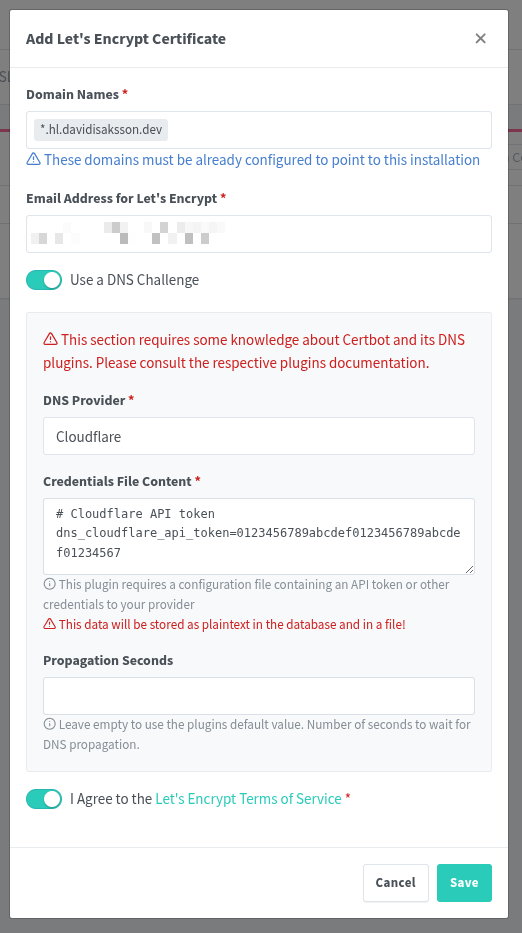
Add Let’s Encrypt Certificate:
- Domain Names:
*.hl.davidisaksson.dev- Your wildcard domain name. - Email Address for Let’s Encrypt: Your email address.
- Use a DNS Challenge: Checked
- DNS Provider: Cloudflare
- Credentials File Content: Enter the API token from previous step:
dns_cloudflare_api_token=YOUR_API_TOKEN_HERE - Lastly, agree to the TOS.
Adding proxy hosts
Now it’s just a matter of adding hosts to proxy!
To add a new Proxy host in NPM, navigate to Hosts -> Proxy Hosts -> Add Proxy Host
In this new window we fill in web service details. Most services are rather simple. Some might need some extra tweaking, both here in Nginx Proxy Manager, but also on the web service side to allow being proxied.
Let’s start with proxying ourselves.
Nginx Proxy Manager
To proxy Nginx Proxy Manager itself, we add a new proxy host with the following details:
- Domain Names:
npm.hl.davidisaksson.dev- This is where we will find the proxied website - Scheme:
http- The scheme that the website uses - Forward Hostname/IP:
10.0.0.24- Where the website is hosted - Forward Port:
81- On what port the website is hosted
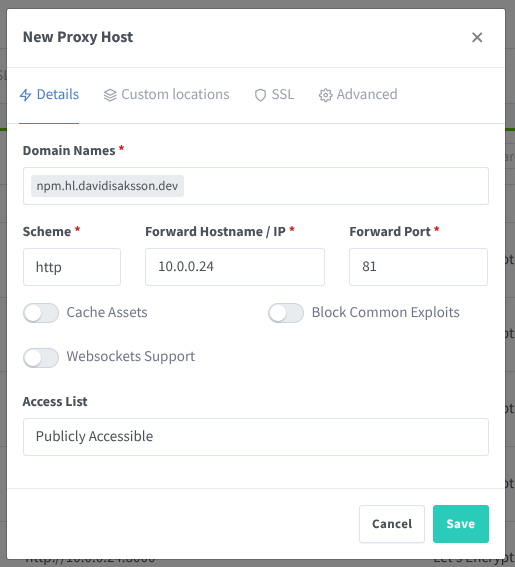
The other fields can be left unchanged in this case
Next, change to the SSL tab and change the following:
- SSL Certificate:
*.hl.davidisaksson.dev- The Let’s Encrypt certificate created earlier - Check Force SSL - Redirect clients automatically from HTTP to HTTPS
- Check Enable HTTP/2 Support - Allows the website to be proxied with HTTP/2 instead of e.g. the older HTTP/1.1

Press save and in your browser, navigate to the domain name you specified.
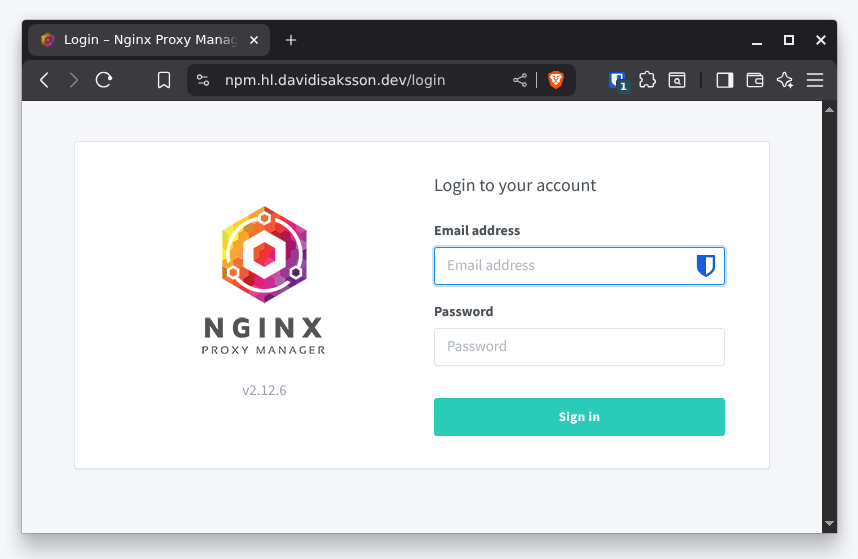
Isn’t that amazing? Both a FQDN and a globally trusted TLS certificate!
Let’s add some more services while we’re up in speed.
Paperless-ngx
Paperless-ngx is a document management system and it is one of the newest member of my family of self-hosted services.
To add it to NPM, follow the steps above, but with the correct FQDN, IP and port.
In addition to this we need to edit the configuration for Paperless-ngx. Add the following variables to its environment:
PAPERLESS_URL=https://paperless.hl.davidisaksson.dev
PAPERLESS_TRUSTED_PROXIES=10.0.0.24
where PAPERLESS_URL is the URL which we want to use to access Paperless-ngx
via NPM, and PAPERLESS_TRUSTED_PROXIES is the IP address of NPM.
See the Paperless-ngx documentation for more info.
Home Assistant
Home Assistant is similar to the other NPM configurations, but needs some extra tweaks.
In NPM, for this proxy host, make sure to enable Websockets support. Without this, the web page won’t load.
Also, on the Home Assistant side, we need to allow the site to be proxied. In its configuration, add the following snippet:
# configuration.yaml
http:
  use_x_forwarded_for: true
  trusted_proxies:
    - 10.0.0.24  # <- Your reverse proxy IP here
You can read more in Home Assistant’s documentation.
Closing words
I hope you learned something from this post, I know I certainly did during the first setup and during the time writing the post. If you thought it was interesting or have any questions, reach out.
Just some final thoughts on security when using a reverse proxy:
- Add firewall rules on the proxied services to only allow traffic from reverse proxy
- Only expose NPM port 80 and 81 to localhost
- Check “Block Common Exploits” in NPM proxy host settings
OK, that’s all for now. See you next time!
 Discuss on Hacker News
Except for when it isn’t… https://blog.cloudflare.com/18-november-2025-outage/ ↩︎