This is part 1 of a short series about setting up DNS hosting with Cloudflare and using DNS-01 challenges to get TLS certificates from Let’s Encrypt for locally hosted web services in a homelab.
See part 2: Setting up a local reverse proxy with Nginx Proxy Manager and Let’s Encrypt
I bought this domain via Namecheap a few years back. Namecheap’s services has been working fine. Not a very expensive domain name and the DNS hosting was good. My requirements for DNS hosting are very simple – I want to be able to add some extra records and keep them up to date via Dynamic DNS (DDNS) if (when) my IP addresses change due to e.g. DHCP leases running out so the domain name always points to a valid IP address.
But if I enjoy their services, why then am I moving DNS hosting from Namecheap? The reason is that I want to try to use DNS-01 challenges to set up certificates via Let’s Encrypt for locally hosted web services in my homelab, but Namecheap’s DNS server does unfortunately not support this feature, hence the move to Cloudflare. There might be another post on that topic which I will link to here when available.
I figured I might as well document this migration, so follow along if that sounds interesting. The steps needed in my situation are to create a Cloudflare account, migrate DNS hosting from Namecheap to Cloudflare. When that is done I need to make sure my DNS records that point to dynamic IPs are updated when changed using DDNS. This is done through my pfSense firewalls.
DNS migration
Let’s start with moving the DNS hosting.
- Create an account on Cloudflare
- Right after the account creation, you will be prompted for a domain name to set up. Enter your domain, which in my case davidisaksson.dev. It will then scan the domain for DNS records.
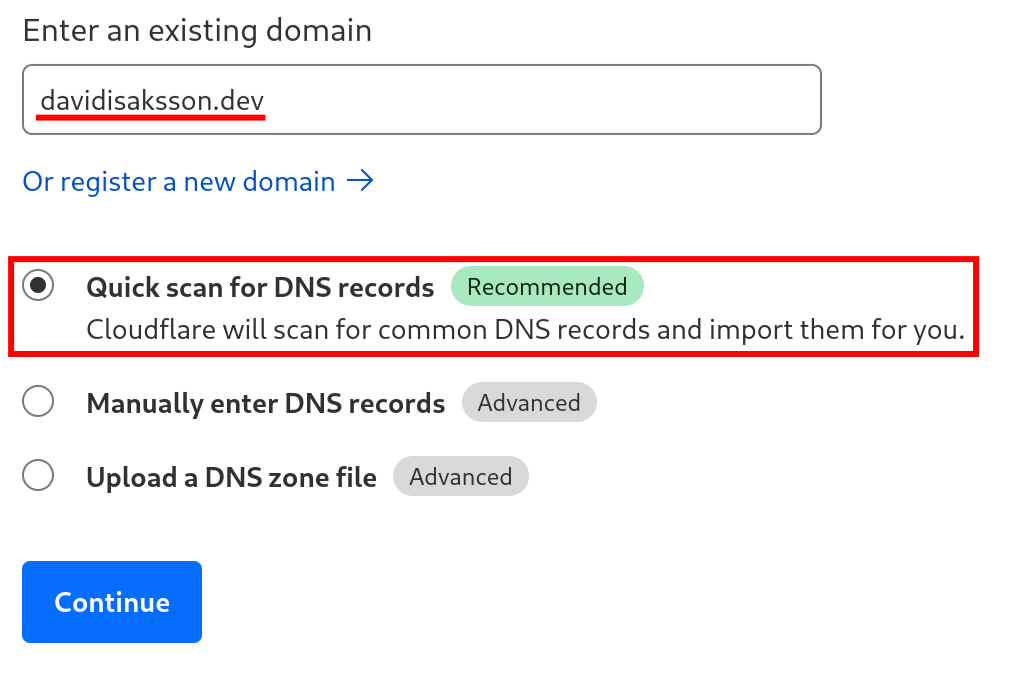
- When prompted about what plan to use, select the free plan. This is sufficient for our use case.
- When the scan is complete, review the transferred DNS records:
- Make sure records found by Cloudflare match the records you want to keep at Namecheap’s control panel
- Delete records that no longer apply, such as MX records if you’re not using email
- Delete old nameserver records
dns1.registrar-servers.com - Here we can also enable Cloudflare’s proxy on specific records which serves as a protection against DDoS attacks and caches the website for quicker response times.
- Replace Namecheap’s nameservers with Cloudflare’s by navigating to Namecheap’s control panel -> Domain -> Nameservers and in the drop down menu select Custom DNS. Enter the nameservers listed on Cloudflare. In my case
michael.ns.cloudflare.comandollie.ns.cloudflare.com. Save by clicking the small check mark to the right.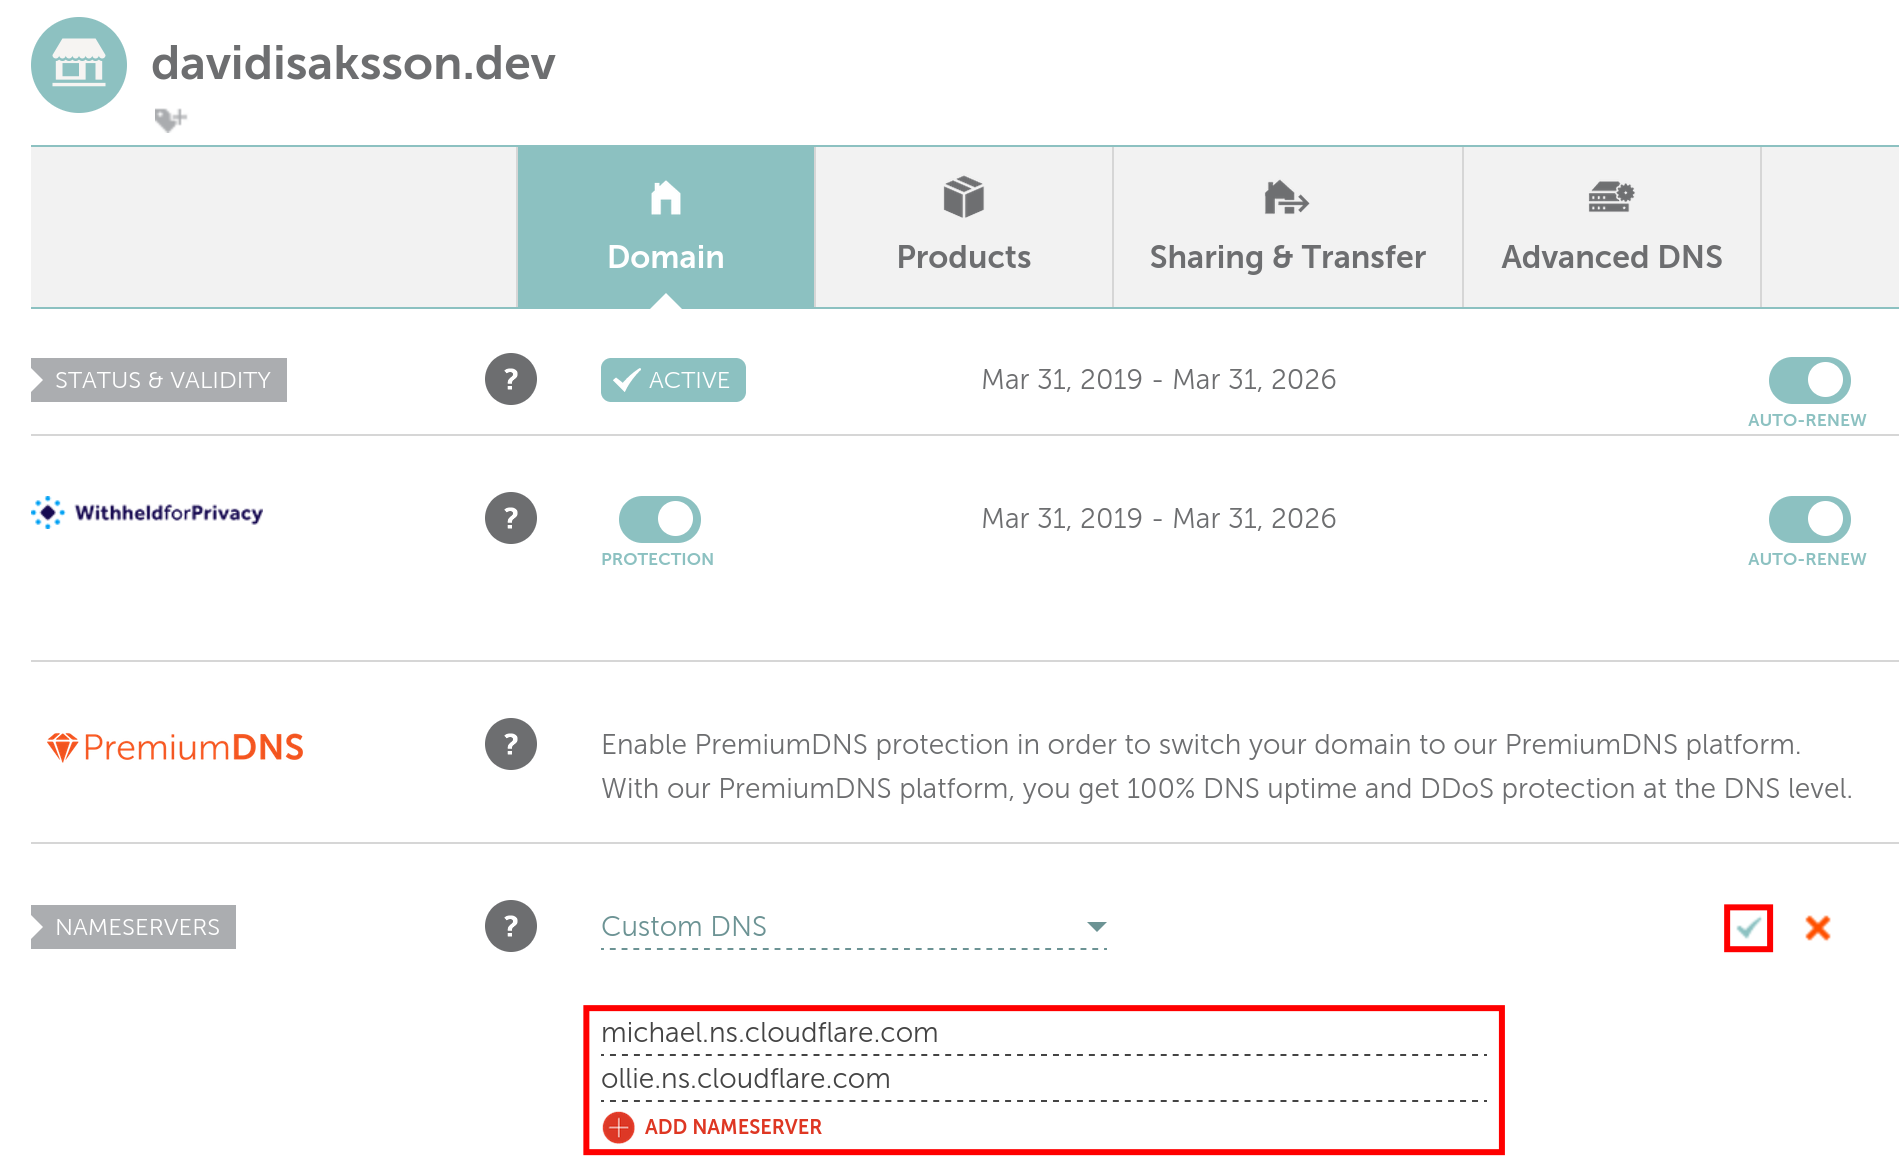
- Wait some time for the DNS servers to settle.
To verify that it is working correctly, use dig to query the NS record:
$ dig NS davidisaksson.dev +short
michael.ns.cloudflare.com.
ollie.ns.cloudflare.com.
Looks good! Now the DNS migration is complete. Just the DDNS part left.
Redoing DDNS
My pfSense firewalls have built-in Dynamic DNS clients that automatically push updates to the DNS server about changing IP addresses, but they are only set up for Namecheap’s DNS. Let’s point them towards Cloudflare instead for continued operability.
Creating a DDNS token
To be able to update DNS records in Cloudflare we need an API token.
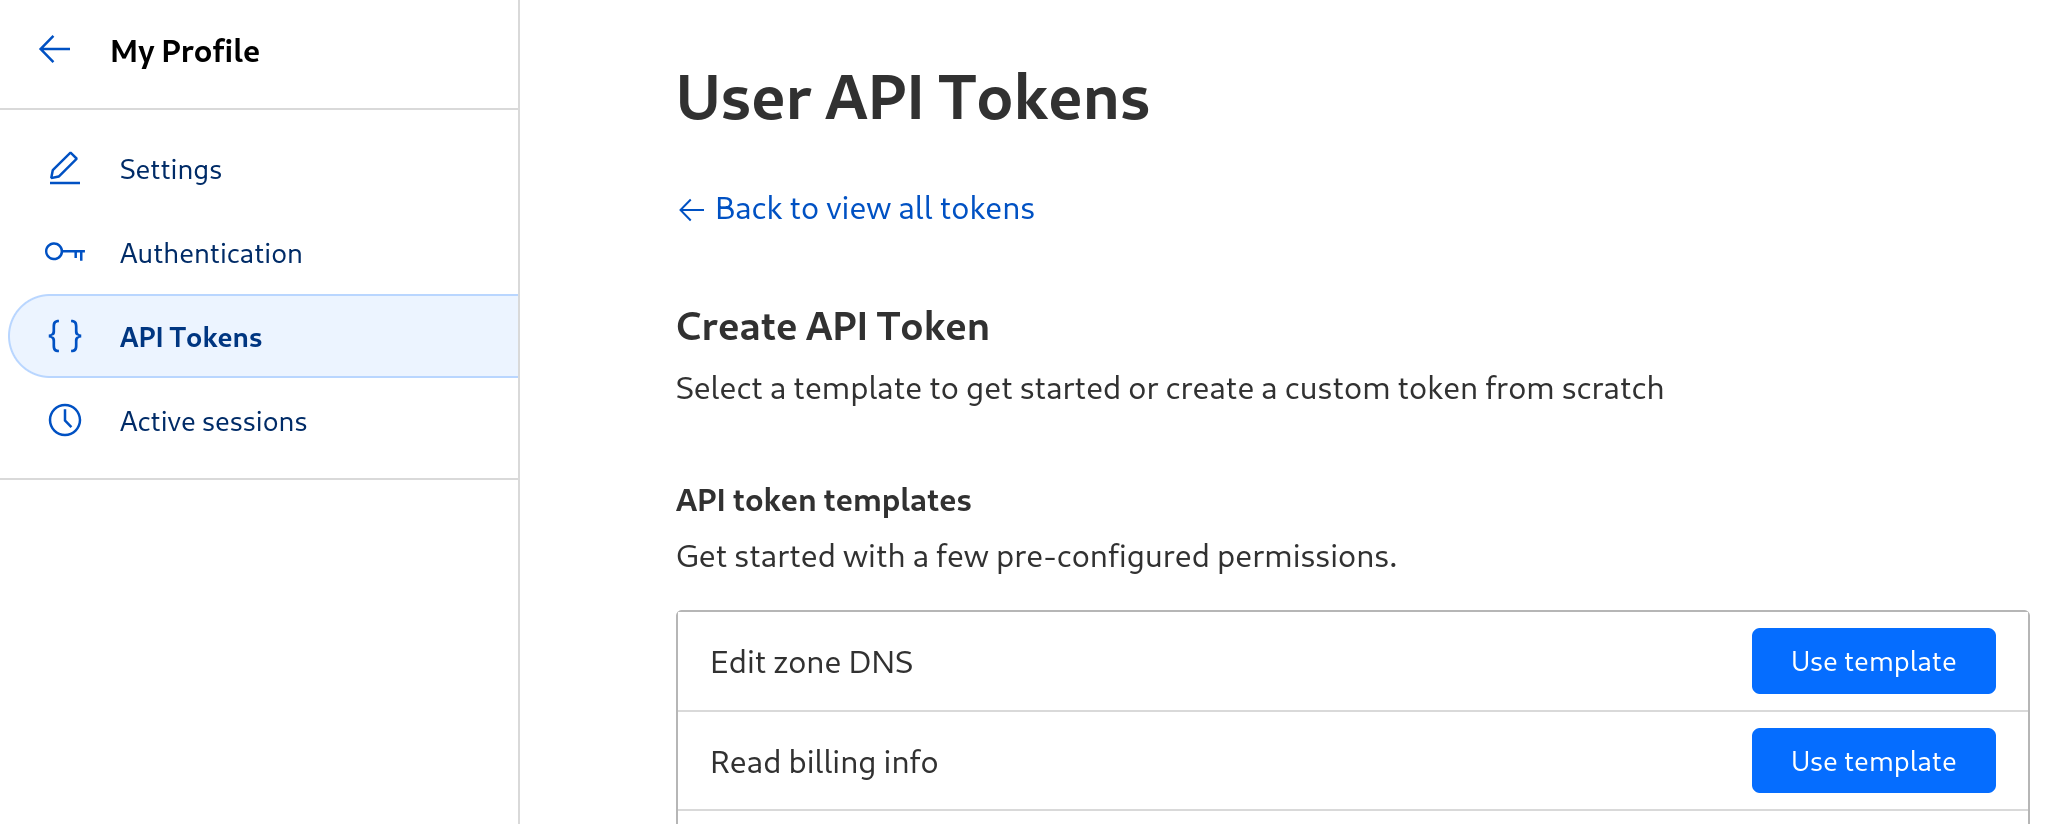
- Navigate to Cloudflare -> click the person icon top right -> Profile -> API Tokens
- Under API Tokens, click Create Token
- The first choice, Edit Zone DNS is what we want, so click its Use template button
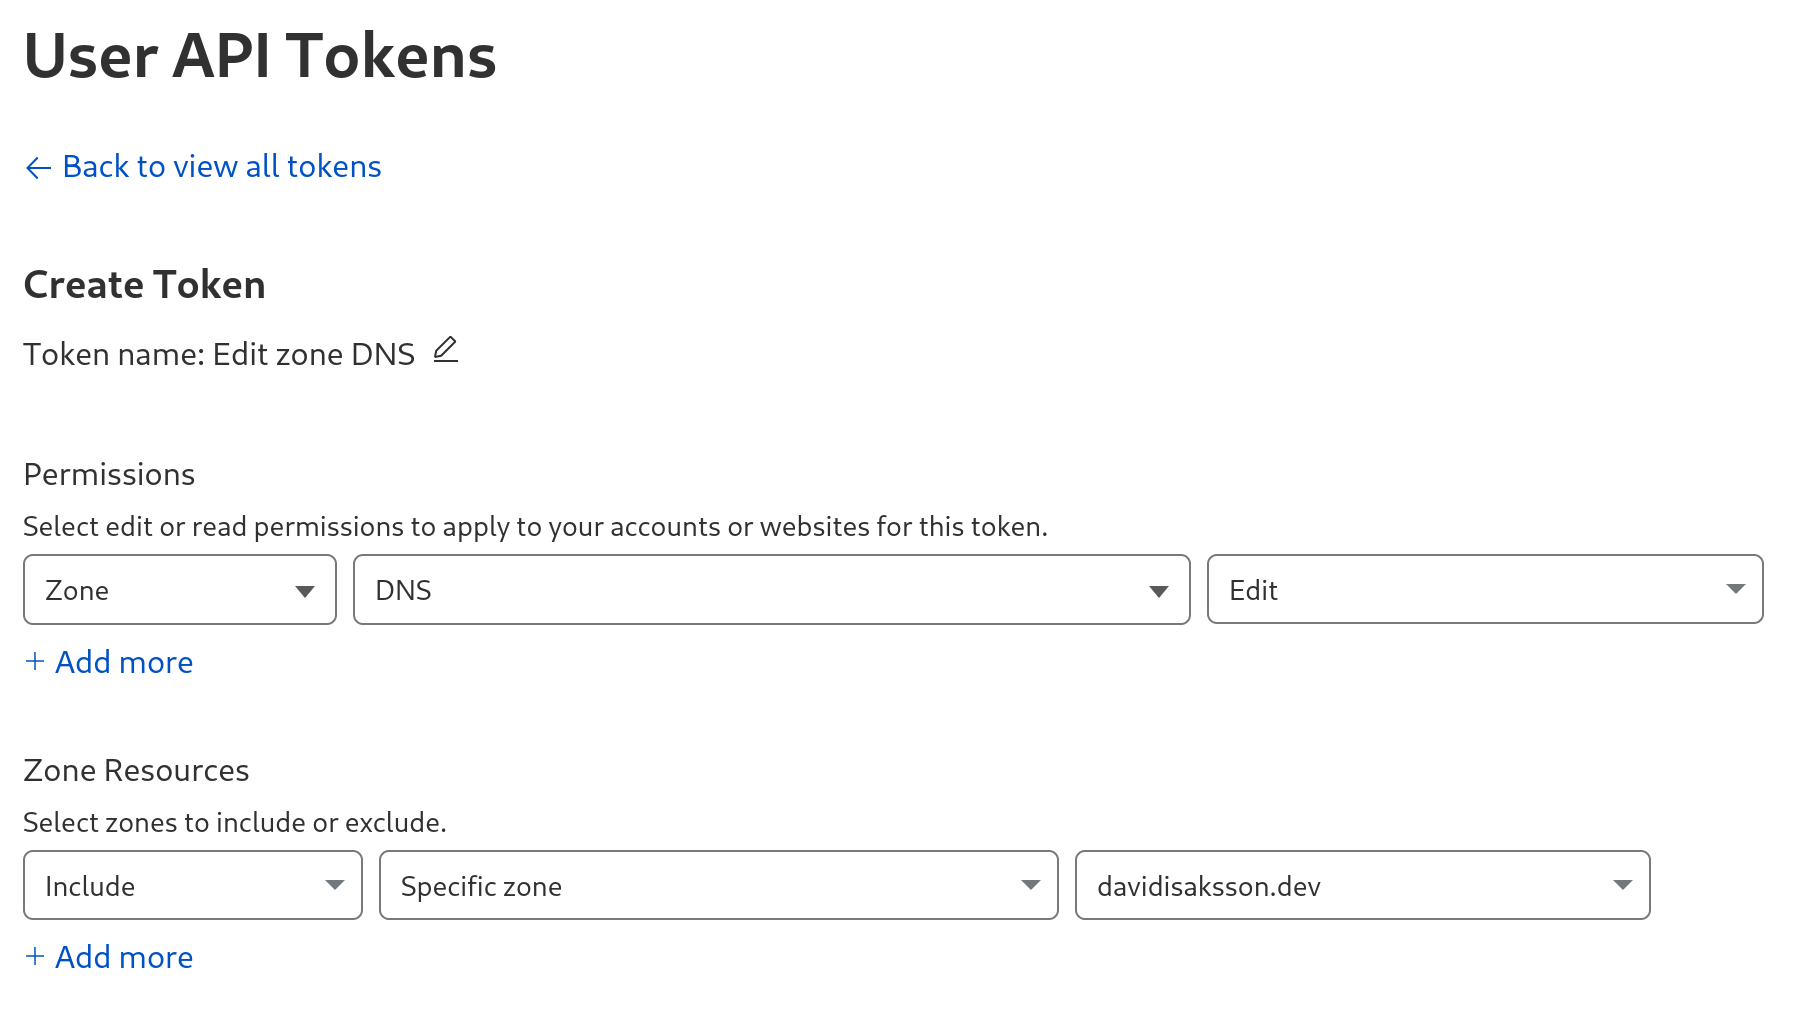
- Fill out details to give us permission via an API token to edit a specific DNS Zone.
- Permissions: Zone, DNS, Edit
- Zone resources: Include, Specific zone and select your migrated zone. In my case davidisaksson.dev
- Scroll down and click Continue to summary
- Verify the details, and click Create token
- Make sure to copy this token and keep it safe
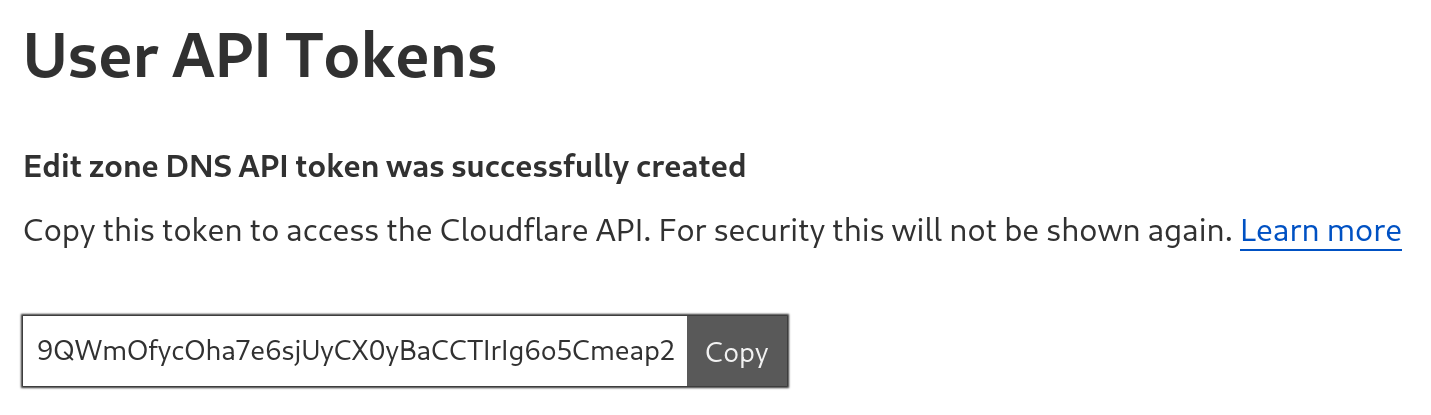 (don’t worry, this particularly token got deleted after the screenshot)
Now we have a way to authenticate ourselves when updating DNS records via Cloudflare’s API.
Redoing DDNS in pfSense
Here is the process for how to set up a DDNS client in pfSense.
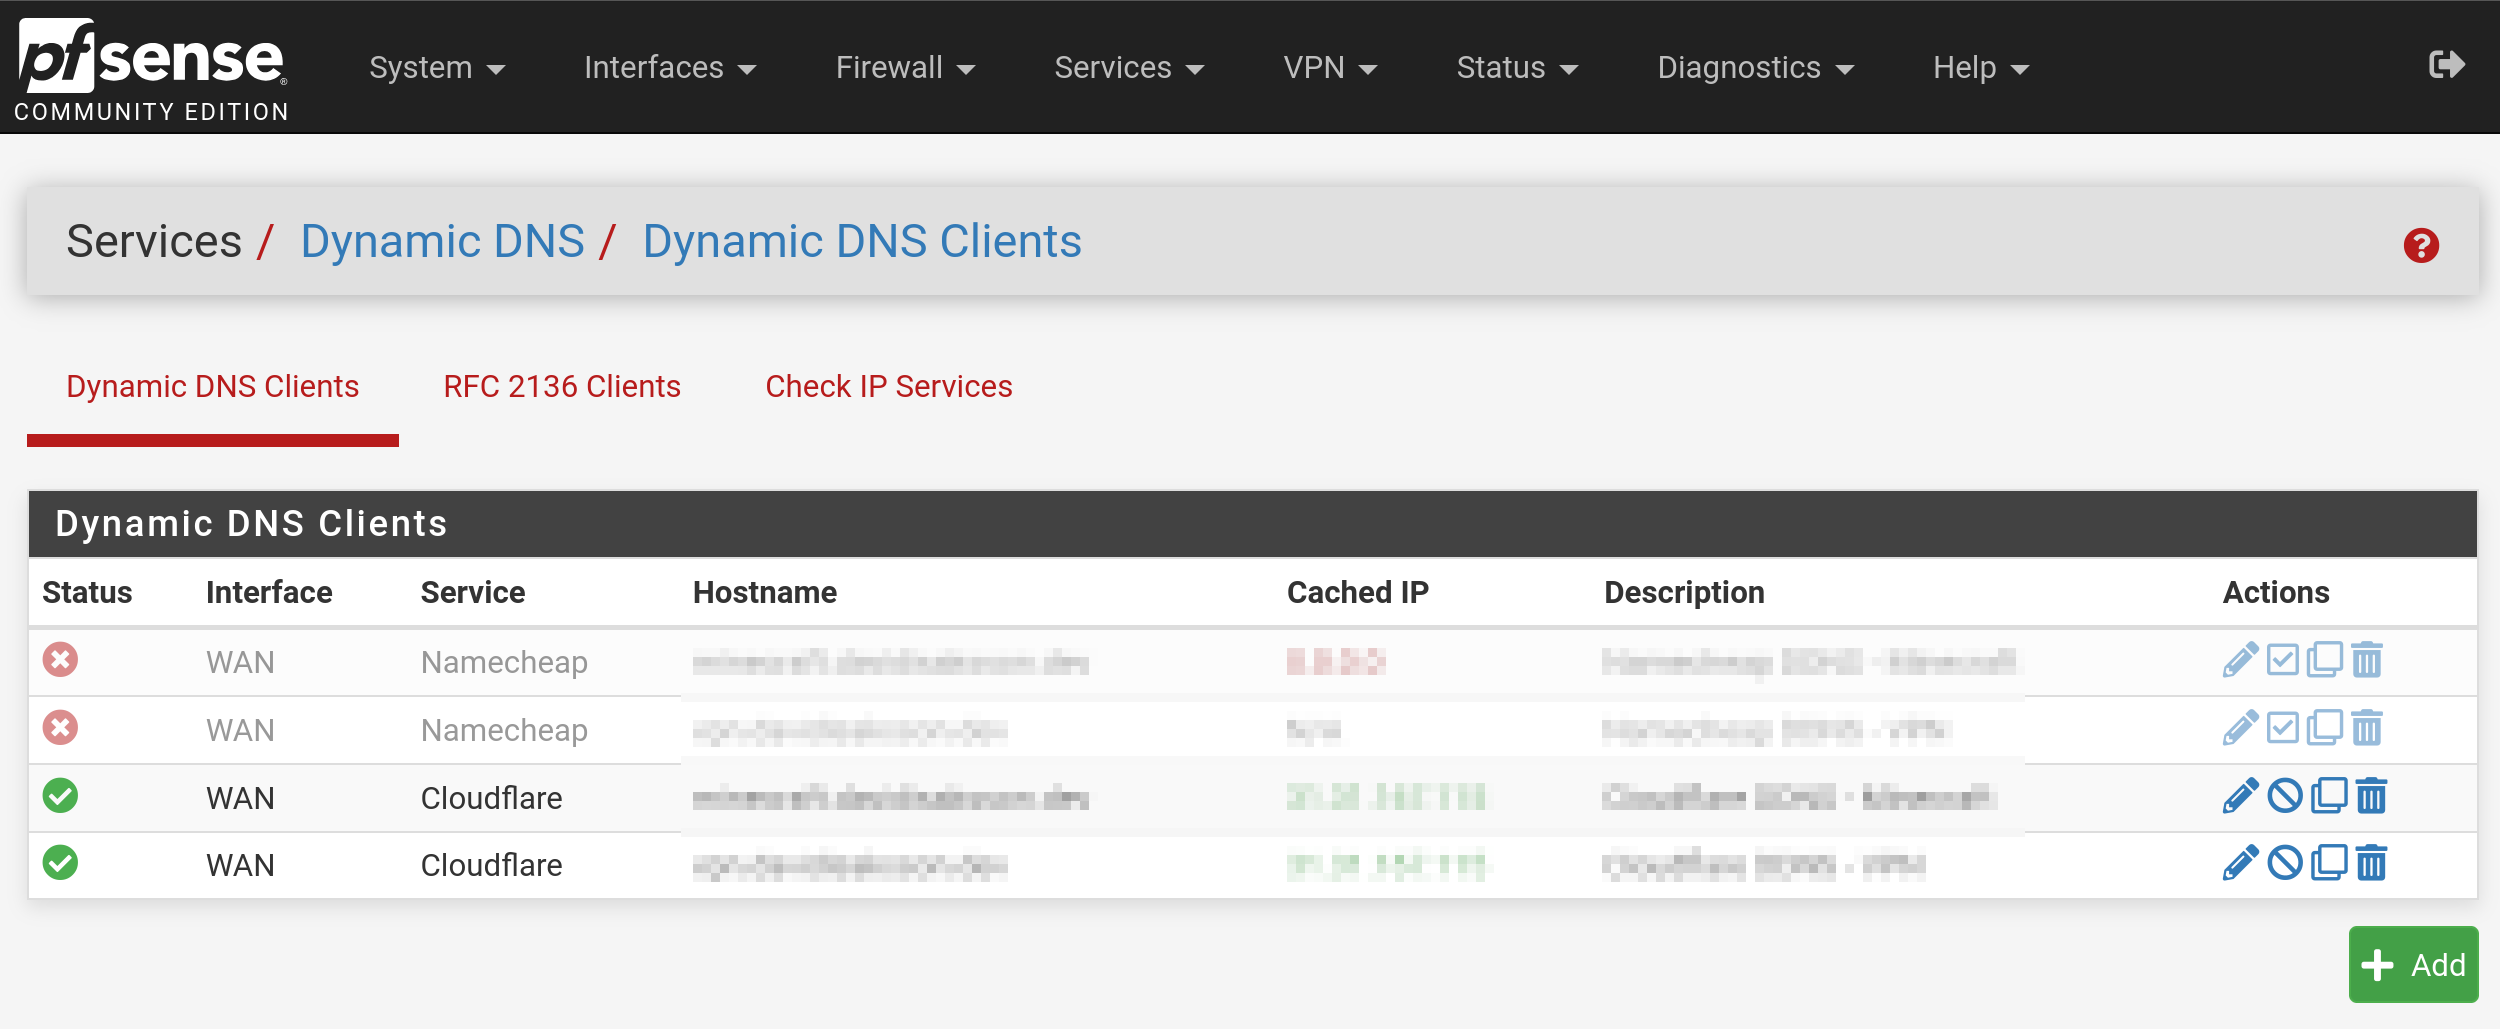
- In pfSense -> Services -> Dynamic DNS
- Click Add and fill out details
- Service Type: Cloudflare
- Interface to monitor: Most likely WAN
- Password: DDNS Token from previous step
- Description: Something nice such as Cloudflare - DDNS Home
- To save, scroll down and click Save & Force Update
- If everything went well, you should now see a green check mark and an IP under Cached IP
- As a last step, I disabled the old Namecheap clients. I could’ve just removed the old ones, but I might as well leave them for documentation sake.
I then repeated the same steps for my other firewall.
Note: If the status icon is red and no IP address is shown the DNS record for the hostname may not exist. Make sure an A record is set up in Cloudflare and try to force update again.
In pfSense, troubleshoot with logs via the Status menu -> System Logs and search for “dyndns”
Closing words
The migration was easier than I initially expected, which is always a pleasant surprise when doing these kinds of things. I also got the bonus of DDoS protection and caching.
Next step is to tinker with wildcard TLS certificates from Let’s Encrypt to use for firewalled applications. Hope to see you there!
Part 2: Setting up a local reverse proxy with Nginx Proxy Manager and Let’s Encrypt
 Discuss on Hacker News