
Update (2026-04-07): The Todoist API used in the post has been deprecated. It is now updated to use the newer
/api/v1path. See https://developer.todoist.com/api/v1/ for more information.
Introduction
Your Bitwarden vault contains (hopefully) all of your passwords and other sensitive data, so it would be good to have a backup of it in case something goes wrong.
In this post, we will explore how to export your Bitwarden data, keep it safely encrypted with PGP, and set and complete backup reminders using Todoist.
Prerequisites
- Bitwarden account
- PGP key pair (optional but recommended)
- Todoist account and API key (optional)
Bitwarden CLI setup
Downloading and installing Bitwarden CLI
The Bitwarden CLI tool is available for download on the Bitwarden website. Simply follow the instructions and ensure it’s included in your $PATH.
Logging into Bitwarden CLI
There are multiple ways to log into Bitwarden via the CLI – via interactive login, API key or SSO. I chose to use interactive login, since I don’t want to store my all mighty Bitwarden API key in plain text on my machine.
One thing to note is that you will have to enter it every time you want to log in which in turn means you can’t automate the backup process with a cronjob or similar. Automated backups are always preferable, but I think the trade-off is worth it for the added security. This is why we’ll use Todoist to remind us to run the backup command regularly. More on that later.
You can log in by running bw login and follow the instructions.
$ bw login
? Email address: [email protected]
? Master password: [hidden]
? Two-step login method: YubiKey OTP Security Key
? Two-step login code: xxxxxxxxxxxxxxxxxxxxxxxxxxxxxxxxxxxxxxxxxxxx
You are logged in!

...
Exporting Bitwarden data
To export your Bitwarden data, you can use the bw export command.
$ bw export --raw --format json
? Master password: [input is hidden]
{...} # Vault data
This will let you enter your master password and then it will output (almost) all of your data in JSON format to the terminal.
What data is exported?
A big part of the data is exported, but not all of it.
Some data that’s not exported (as of November 2023 at least) includes:
- Attachments
- Sends
- Passkeys
- Password history
- Items in the trash
- Data owned by organizations
- (Possibly more, see Bitwarden Support)
Unfortunately, if you wish to back up these parts, it will have to be done manually. Keep that in mind.
A note on the --format flag
Above, we used the --format json flag to specify the output format.
bw export also allows us to export the data with --format encrypted_json which will encrypt the sensitive fields.
I chose to use the plain JSON format mainly for two reasons:
- to not be dependent on Bitwarden’s CLI tool for decryption.
- to not leak any metadata about the entries (e.g. what accounts I have etc.)
Encrypting your backup with PGP
We can now export the data, but it’s still in plain text which is not very secure.
To encrypt the data, we’ll use PGP.
Basics of PGP encryption
PGP stands for Pretty Good Privacy and is a data encryption standard. It uses a public-private key pair to encrypt and decrypt data. On Linux, PGP is often implemented by the GnuPG (GPG) tool, which is what we’ll use in this post.
I will not go into detail about how PGP works, but I will explain the basics of how to use it.
Encrypting the exported data
Let’s expand on the command we used to export the data:
PGP_FP=9D061C14296CE3DBBAF6C5CB7B9F71950D93191B
bw export --raw --format json | gpg -e -a -r $PGP_FP > bw_backup.json.asc
Here we use the gpg command to encrypt the data to an encrypted file bw_backup.json.asc.
The flags above are:
-efor encryption-afor ASCII armor, i.e. the encrypted data will be in ASCII format-r $PGP_FPto specify the recipient of the encrypted data
$PGP_FP expands the variable which contains the fingerprint of the public key we want to use for encryption.
In this case, it’s my own public key which means only I can decrypt the data.
To verify that we also can decrypt the data, let’s run gpg with the -d flag for decryption:
gpg -d bw_backup.json.asc
The data is now decrypted and we can see the plain JSON.
Automating backup reminders with Todoist
Since the Bitwarden CLI does not store the master password, we can’t automate the backup process. This is where Todoist comes in.
Todoist is a task management tool that can be used to schedule tasks and set reminders. I use it for grocery lists, project management, and also in this case for backup reminders.
I have a recurring task that reminds me to run the backup script periodically.
Configuring Todoist for regular backup reminders
To establish a recurring task that sets a new reminder upon completion, we can use “every” followed by an exclamation mark and a time period.
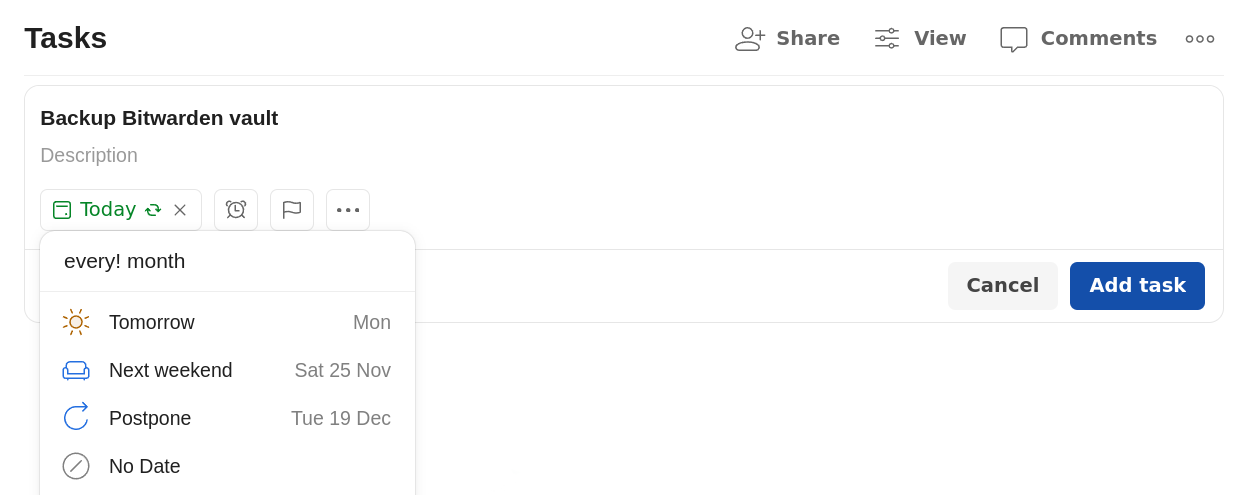
The nice feature of every! month instead of just every month is that the next reminder will be set based on the date of completion, not the date of creation.
This means that if you complete the task a few days late, the next reminder will be set to a few days later as well.
You can read more in their documentation here.
Using Todoist API to complete tasks
Todoist has an API that can be used to interact with your tasks. Here we will use it to complete the recurring task when we run the backup script so we don’t have mark it as complete manually.
Make sure to get your API key from the Todoist Integrations page.
To complete a task via the API, we can use the POST /tasks/:id/close endpoint.
TOKEN=d41d8cd98f00b204e9800998ecf8427e0135234
BW_TASK="68GfxJvXGCMh6XPQ"
curl -sS \
    -H "Authorization: Bearer ${TOKEN}" \
    -X POST \
    https://api.todoist.com/api/v1/tasks/$BW_TASK/close
Putting it all together
Let’s put it all together.
#!/bin/bash

set -euo pipefail

# Set up backup filepath: e.g. /home/david/sync/backup/Bitwarden/bw-backup_2023_11_19_15_41_45.asc
TIMESTAMP=$(date "+%F_%T" | tr ":-" "_")
BACKUP_DIR="$HOME/sync/backup/Bitwarden"
BACKUP_FILEPATH="$BACKUP_DIR/bw-backup_$TIMESTAMP.asc"

# PGP Fingerprint
PGP_FP="9D061C14296CE3DBBAF6C5CB7B9F71950D93191B"

# Create backup
mkdir -p "$BACKUP_DIR"
DATA=$(bw export --raw --format json)
echo "Exported $(echo "$DATA" | wc -l) rows of JSON"
echo "$DATA" | gpg -e -a -r $PGP_FP > "$BACKUP_FILEPATH"
echo "Done ($BACKUP_FILEPATH)"

# Close Todoist task
TOKEN=$(cat ~/.config/todoist/apikey)
BW_TASK="68GfxJvXGCMh6XPQ"
curl -sS \
    -H "Authorization: Bearer ${TOKEN}" \
    -X POST \
    https://api.todoist.com/api/v1/tasks/$BW_TASK/close
echo "Marked Todoist task as completed"
This is basically the same as the code snippets above, but with some extra stuff:
set -euo pipefailfor error handling- Set up backup filepath with timestamp
- Create backup directory if it doesn’t exist
- Read Todoist API key from file
- Some logging
A note on backups
Last but not least, a backup is only useful if you can access it when you need it. A good practice is to backup your backups (see The 3-2-1 Backup Strategy)
Syncthing is a file synchronization tool that can be used to sync files between devices. Personally, I use it to sync documents, notes and some smaller backups between my devices.
I won’t go into detail about how to set up Syncthing, but if there is interest I can write a post about it.
Conclusion
So there you have it – a semi-automated, multi-tool approach for backing up your Bitwarden vault.
We’ve covered how to set up:
- A recurring task in Todoist that reminds us to run the backup script.
- A script that…
- exports Bitwarden data in a future-proof format
- safely encrypts the data with PGP
- completes the Todoist task automaticallt via its API
 Discuss on Hacker News